

One of the worst part of vanlife, is with any doubt, keep the heat away. There are many solutions to minimize it, (the best one being park under the shadow) starting from the isolation, but that, without a minimum of airflow, is not enough to keep the van fresh during the summer.
How can I create airflow inside the van?
There are a few accessories out in the market that can help you with that.
Wind deflectors - Aren't cheap, but it also helps when it's raining, to keep the windows slightly open.
Airlock - It was one of the first things I bought when we got the van, and never used, to be completely honest.
Airvent - Last but not least, the Airvent is (together with the wind deflectors) the best solution. Again, they're not cheap at all, but if you can get a pair (passenger/driver side), it will create the desired airflow. They also come with a nest to prevent insects to get in.
Unfortunately, this accessory has a big downside. The window can't be closed when it is mounted on. That can be solved-ish, with a small piece, that allows you to close the window at 95%.
How can I get one?
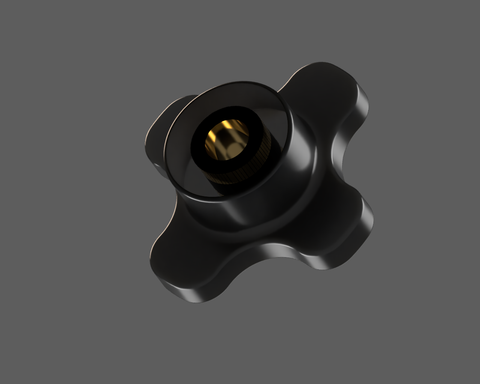
You can download it for free. Is a .STEP file, so in case your Airvent screws uses different Metric, you can modify it.
Get the file!
What do I need to build it?
- 3D Printer (You can also use any online service or local 3D Printing stores).
You can find more information about this printer, which is the one that I use, and our selection of the best 3D printed parts in this Blog post .
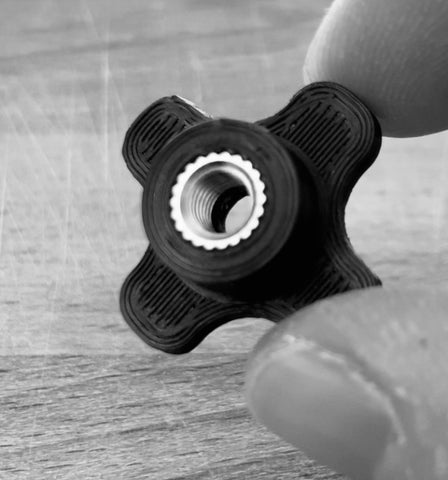
- Threaded inserts (The piece is designed to allocate M5x6mmx7mm inserts). This is a kit for this, and future projects :)
- Iron: I've been using this one since a few months. This is a really basic one, but enough and reliable if you plan to use it only when needed and not in a daily basis.
- Metal saw.
HOW can I build it?
- Download and print the piece
- Pre-heat the Iron
- Place the threaded insert in the hole (inner face) as leveled as possible.
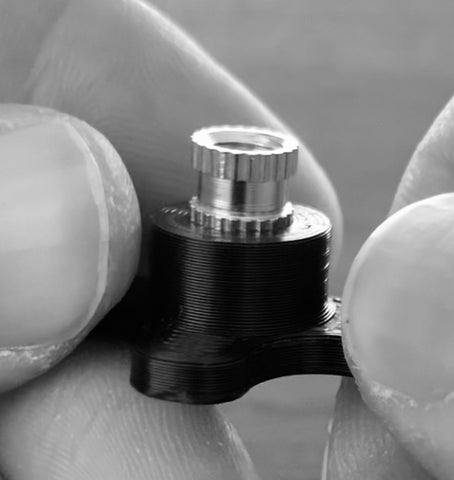
- Push down slowly and as straight as possible until the insert lays flush.
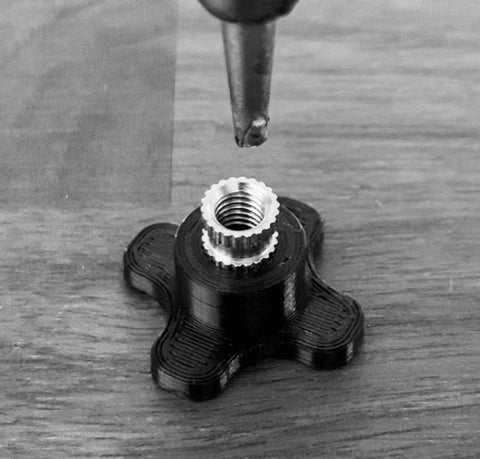
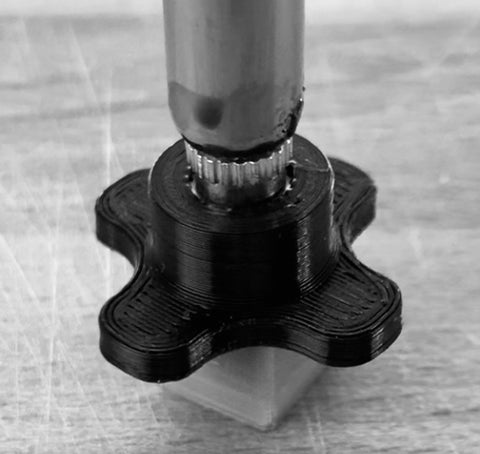
- Check the threaded insert is flush with the inner face of the piece
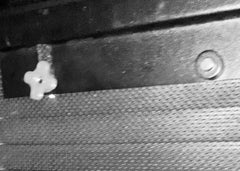
- The last step is to trim the pivots that will prevent the window to close regardless if you did the mod or not (Sorry, I don't have better images as I did not plan to write the post in a first instance, so I only have screenshots from a video.)
In the first image (left) you can see the pivot, in the second (right), has been trimmed off.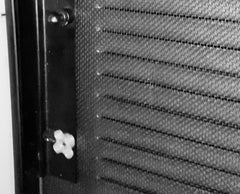
And this is done! Now you can mount it on your Airvent and let the air flow!.Don't forget to tag us on Instagram on @WEAREBFREEX if you build yours.